Advertisement

10 tips to make building your retaining wall easier

26 April 2019

1. Your wall should suit your lifestyle, budget and physical ability

Retaining walls are usually thought of as utilitarian and for merely holding back soil. While this is true, you can also use them to create beautiful outdoor living spaces to create multi-use spaces. Keep in mind that if you're doing this solo it has the ability to become quite draining (retaining wall puns rock). In many situations  you'll save your back and your sanity by hiring some heavy equipment **notably hire an escavator** 

2. Make a Creative Design

Retaining walls don’t have to be perfectly straight. Add a curve to dress up the design and to add a little more texture to your landscape. You can use a garden hose or large rope to set the layout of the curve, then use a shovel to cut through the soil to follow the curve.


3. Size Does Matter

Smaller retaining walls, less than four feet, can be easily planned and created without worrying too much about structure. Larger walls above that height may need an engineer’s touch. Also be sure to check with local codes before starting one more than four feet tall.


4. Think Terracing

From a lower grade, you’ll need to gradually step up the retaining wall to reach a greater slope. Do this in increments and plan for a slight offset for each course change.


5. Manufactured Blocks and Stones Are Easier

Besides offering a consistent look, manufactured blocks and stones for retaining walls offer structural integrity and an even base with which to work. There is little guesswork in installing, plus you’ll have less work to do making sure each course is level. Be sure to color match and space out uneven colored stones and blocks for a better look.


6. Create A Solid Base

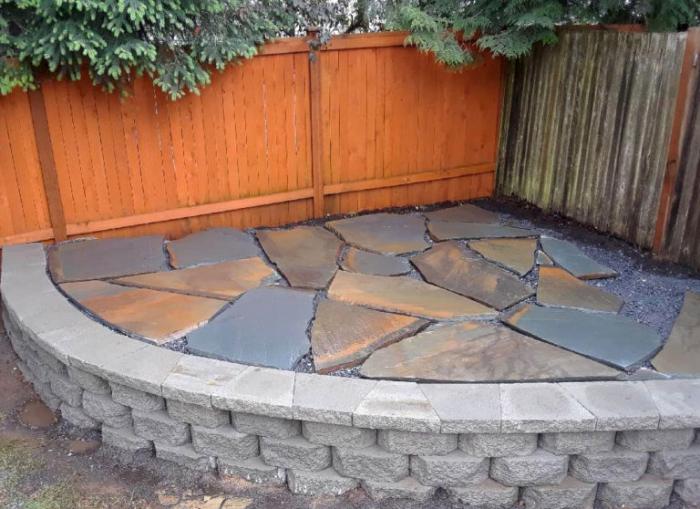
Dig out your base several inches below grade and tamp/compact it to level. Add any filler, such as gravel, before adding your first stones or blocks. Remember, the base sets the tone for the entire wall, so spend a lot of time in preparing this key component.


7. Plan For Drainage

A retaining wall that has a slope dropping to it will need additional drainage at the base. Add gravel and a fabric-covered drainage pipe at the base. The fabric will help prevent clogging of the pipe; a key feature as you will not want to dig out the pipe later to unclog it.

 
8. Keep It Level

For each course of stones and blocks, be sure to check to ensure they are level. This will help maintain a sturdy and balanced wall, plus you’ll keep an even and consistent look.

 
9. Backfill Adds Support

Backfilling as you go adds support in success layers, so as you add a new course of blocks or stones, backfill to match this level. Be sure to tamp in/compact the soil as well, so you don’t have as much settling later.

 10. Add Finishing Touches

By adding masonry or paint you can create a well-styled look for your retaining wall. This wall features a geometric painted design with plants on top.


Pictures

Advertisement
Blog archive
Advertisement
Advertisement