Building a new home or major renovation is an exciting but complex journey. Understanding the typical construction process helps you stay informed, ask the right questions and make better decisions at every stage.
While the exact steps may vary slightly depending on your builder, design and location, most residential construction projects in Australia follow a broadly similar process—from early approvals to final handover.
1. Planning and approvals
Before construction begins, you’ll need to finalise your plans, select a builder and obtain the necessary approvals. This stage typically includes:
- Engaging an architect, draftsperson or designer to prepare working drawings
- Commissioning a land survey, soil report and engineering plans
- Submitting your design to council or a private certifier for planning and building approval
- Signing a building contract and confirming inclusions, exclusions and allowances
If you’re building in a bushfire zone, flood-prone area or heritage overlay, you may also need to submit additional reports to meet National Construction Code or council requirements.
Once approvals are granted and the contract is signed, your builder will issue a start date and begin ordering materials, scheduling trades and arranging site preparation.
2. Site works and slab
The first on-site phase is all about preparing the land and laying the foundation. This includes:
- Clearing vegetation and levelling the block
- Installing temporary fencing, site signage and erosion control measures
- Excavating for footings, drainage and plumbing services
- Pouring the slab or building the subfloor
Most modern homes are built on concrete slabs, though homes on sloping sites may use stumps or piers. Once the slab cures, your builder may waterproof the perimeter and install termite protection if required.
3. Frame stage
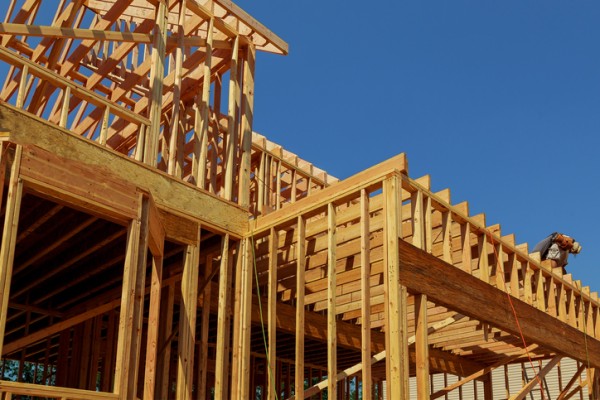
With the foundation in place, the frame is erected to form the skeleton of the house. This typically includes:
- Timber or steel wall frames and roof trusses
- Load-bearing beams, lintels and structural supports
- Window and door openings
- Temporary bracing
Framing must comply with AS 1684 for timber or AS/NZS 4600 for steel and will usually be inspected before the next stage proceeds. At this point, you’ll get your first real sense of the home’s shape and layout.
4. Lock-up stage
Also called the shell stage, this is when your home becomes secure from the weather. It generally includes:
- Installing external cladding, such as brick veneer, weatherboard or fibre cement
- Fitting the roof sheeting or tiles
- Installing windows and external doors
- Adding wall wrap or sarking for weatherproofing
Depending on your contract, the builder may also install garage doors, external plumbing and guttering during this stage.
Once lock-up is complete, you’re usually invoiced for another progress payment under the terms of your contract.
5. Rough-in and services
Before walls are lined, essential services are roughed in. This stage involves:
- Running electrical wiring, switch boxes and lighting cabling
- Installing plumbing for hot and cold water, sewer and stormwater
- Routing ducts for heating, cooling and ventilation
The electrician may also install provisions for smart wiring or home automation systems if specified. Once everything is roughed in, the frame may be inspected again before lining begins.
6. Internal linings and sealing
With services in place, internal linings are installed to create the internal walls and ceilings. This usually includes:
- Fixing plasterboard sheets to walls and ceilings
- Stopping and sanding joins to create a smooth surface
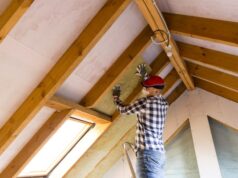
- Installing ceiling insulation and acoustic batts if specified
Skirting boards, architraves and cornices are often added around this time. At the same time, waterproofing is applied to wet areas such as bathrooms and laundries in accordance with AS 3740.
7. Fixtures and finishes
This stage sees the home begin to take shape with visible features and finishes. It includes:
- Installing kitchen and bathroom cabinetry
- Laying floor tiles, timber or other flooring types
- Fitting taps, sinks, basins and toilets
- Painting walls, ceilings, doors and trims
- Installing light fittings, power points and appliances
It’s also when interior doors are fitted and wardrobes or built-in storage is completed. Quality checks are usually performed throughout to ensure everything meets specifications.
8. Final stage and handover
Once all work is completed and the home is clean and safe, your builder will arrange a final inspection. You’ll walk through the property with them and create a defects list (often called a ‘punch list’). This is your chance to raise any incomplete, faulty or substandard work before final payment.
Once defects are resolved and the builder provides a certificate of occupancy, the home is officially handed over. You’ll receive keys, warranties and documentation including appliance manuals, compliance certificates and energy ratings.
After handover
Most contracts include a maintenance or defect liability period—typically around 3-6 months—where the builder is responsible for fixing any minor faults that emerge after handover. Make sure you keep a list and notify your builder within the agreed timeframe.
From there, you’re free to move in, add landscaping, or continue with external works like decking, fencing or driveway finishes.
Things to keep in mind
- Weather, supply issues and trade availability can affect timelines
- Variations and upgrades may add time and cost—always document them in writing
- It’s okay to ask questions—your builder should keep you updated at each stage
- Keep copies of all paperwork, receipts and approvals in one place
Understanding the process helps you stay proactive and confident throughout your build. From the slab to the final clean, knowing what’s next lets you make better decisions and get the most from your new home.


