
Whether you are planning to paint by yourself or engage help from outside, mistakes are bound to happen, especially for beginners. But by keeping a few simple tips in mind, the process can run a lot smoother, saving you time and energy.
Below are some of the most common “oops” moments we all face that could wreck the house painting experience.
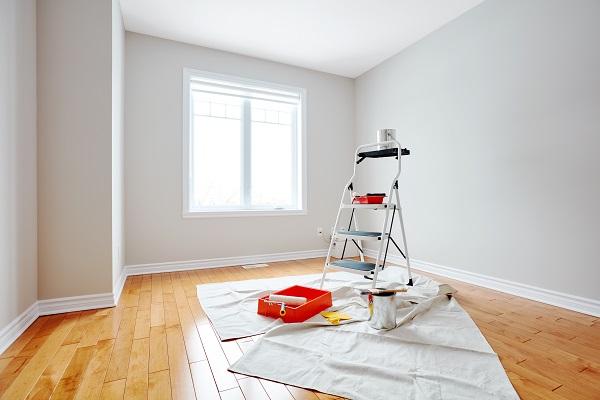
Poor prep work
While we understand that you’re excited to give a nice makeover to your house, don’t let it blur your mind. Most of the first-timers don’t devote enough time to arrange things beforehand. This causes a lot of wastage, in terms of both money as well as energy. Taking out time to do preparation is essential.
For instance, make sure that the walls have been dusted properly. Dirty walls don’t soak the paint well. Plus, preparing the paint before and deciding to clean the walls later, disturbs the consistency of the color. Cover everything that remains in the room with sheets, tapes and masks before painting. It is better to check in advance if any repair work is needed and get it over with.
Low-quality tools
Substandard tools hamper efficiency but many people underestimate this factor and compromise with the quality of these tools. And it shows in the final result.
No matter how superior the paint quality is if the tools are cheap you won’t be doing justice to your walls. It is the responsibility of the brushes and the rollers to bring out the best in the paint so be ready to spend a decent amount on these pieces of equipment.
Not trying out the shade
The basic way to select a shade is by looking at the colour chips in the booklet. Honestly, by doing this you are only halfway through. The other irreplaceable step is to try a patch on the wall and then see how it comes out. Color chips can help you come down to a few likely choices but you should never rely on a booklet to make the final decision.
The shade on the paper would not necessarily look the same on the wall. The walls have a different texture than paper. Apart from that, you also need to see how the colour looks during the day and at night. Doing so is only possible with a patch on the wall.
The disastrous reverse matching method
Almost every one of us is guilty of this blunder! What makes it even worse is that it is hard to undo the process. We are talking about picking the wall shade before deciding the colour of curtains and other fabrics. While it doesn’t occur to us at first, this is really a terrible mistake.
In short, never choose the wall colour first. Always plan on what kind of fabric shades you want to see in that room. After you’re done with that, let the fabric shade guide you to the right wall color. Otherwise, it just gets tiresome to search for the matching fabric later.
Leaving the floor and roof vulnerable
It seems perfectly fine to start with the walls right away, until you have smudged the roof or the floor piping with your paintbrush or the roller. Whether it is a few little sprinkles or a blunt stroke, wiping that paint off becomes nearly an impossible goal to achieve.
Keeping the floor and roof untouched is not only important, it is easy too. For the floor and the roof, protect the borders and corners with the help of tape. Another way to stay in the safe zone is to paint a thick horizontal strip along the line and then proceed with the vertical strokes without a worry.
Mishandling the paint
Those fabulous-looking colours are not something to play with. Paints are chemicals that can change their consistency depending on how well or poorly they are being treated. For instance, it sounds like a minor thing but leaving the lids open for long and letting the paint sit causes it to dry up. There are also increased chances of someone tripping and spilling those expensive paints all over the floor.
Moreover, if the paint is kept in extreme temperatures, this will leave an impact on its thickness. So, besides keeping the lids closed, take care that the paints are not left behind in any such disturbing temperature conditions. Always remember to keep the paints out of children’s and pets’ reach, to avoid them from getting hurt or touching the fresh paints on the wall.
Skipping the primer
One really needs to understand the chemistry between the wall-surface and paints. Applying a coat of primer on the walls before painting infuses the paint with more life and makes the surface smooth. It also prepares the wall for better absorption and enhances the quality of paint, adding a glossy shine to the coat.
Hurrying up the second coat
Once you’ve taken care of the first coat, take a break for at least 24 hours. Give it a day and let it dry completely. Doing the second coat while the previous one is still wet is not a good idea. A well-dried first round of paint acts as a brilliant foundation to the walls and helps the second and final coat with a smooth finish and velvety touch.
Overdoing It
No matter how tempting it looks, don’t indulge in giving the walls repeated brush strokes. Initially things might look okay but as soon as the surface starts to dry, the particular area will be a little distinct and in an ugly way. As far as possible, try to paint the walls with uniform strokes for an even tone.
How one uses the paintbrush has a lot to do with the final outcome.
To avoid dripping, the best way to use a brush is to dip only one-third of it. If you immerse the brush completely, it clogs the bristles and takes up an excess amount of paint.
Working in dim light
Painting the walls is an art. An art that requires an optimum light for the best results. It makes complete sense to pay attention to the arrangement of lights in the place you wish to paint. The task of painting is meticulous. It carries such details which can be visible only in the proper illumination. Hence, if you don’t want those patches to show up after you’re done, make sure to work in bright lights.
Treating the ceiling same as the walls
Treating the ceiling and walls as the same is completely unacceptable as the textures are different, meaning their needs are different. You can’t paint the roof with the same consistency as that on the walls.
Generally, the ceiling surface is dry so use a paint that is specifically designed to skim-coat the ceilings.
Contrary to popular belief, white is not the best colour for the ceiling and professionals advise a little cream or tinted shade to make the room look more alive.
Following these basic tips and taking the necessary precautions will save you from the teeny weeny headaches. The whole experience will also be much more pleasant and memorable. So, the next time you plan to paint the house, take the painting game to a whole new level and have fun with the family!
These are some handy hints from the master painters at Paintmates, if you want us to handle the hard work, contact us directly or visit our website.
House Painting Mistakes Almost Everyone Makes

