Waterproofing and tiling might not be the most exciting part of your renovation, but they’re among the most important—especially in bathrooms, laundries, kitchens and balconies. A poor waterproofing job can lead to leaks, damp, mould, structural damage and costly repairs down the track.
In Australia, waterproofing is tightly regulated and must meet strict standards set out in the National Construction Code (NCC) and a number of Australian Standards. If you’re renovating a wet area, understanding these requirements is essential.
Here’s what you need to know to stay compliant and build to last.
Why waterproofing matters
Waterproofing is all about creating a barrier that prevents moisture from penetrating the structure of your home. Wet areas such as bathrooms, laundries and balconies are especially vulnerable to water ingress, which can cause rot, swelling, tile failure and even damage to nearby rooms.
When done properly, waterproofing ensures these areas stay safe, dry and structurally sound—protecting both your renovation investment and your home’s long-term integrity.
What the rules say
In Australia, the main requirements for waterproofing are laid out in:
- AS 3740:2021 – Waterproofing of domestic wet areas
- AS 3958.1 – Guide to ceramic tile installation
- AS 4654.2 – Waterproofing membranes for external above-ground use
- AS/NZS 4858 – Wet area membrane performance requirements
- NCC Volume Two, Part 10.2 – Wet area waterproofing
These standards set out where and how waterproofing must be applied, what materials are acceptable and how systems should be tested before tiling begins. In most states and territories, waterproofing work must also be completed by a licensed professional and certified upon completion.
Key waterproofing requirements by area
Bathrooms and showers
Showers must be fully waterproofed across the floor and up the walls to at least 1,800mm, or to 50mm above the height of the shower rose—whichever is higher. Floors must also be graded to ensure water flows directly to the drain without pooling.
Around baths, basins and laundry tubs
Walls surrounding baths and laundry tubs must be waterproofed to at least 150mm above the fixture. The floor in a bathroom or laundry may only need to be water-resistant rather than fully waterproof, depending on its level in the building and the floor construction type—but sealing junctions and penetrations is always required.
External areas (balconies, rooftops)
For any above-ground outdoor areas, AS 4654.2 applies. This standard requires full coverage with a compliant membrane system, along with proper drainage, fall and protection from UV and foot traffic. These areas also require careful attention to expansion joints and penetrations like balustrade fixings and door thresholds.
Materials and installation
Liquid-applied and sheet membranes are both acceptable under Australian standards, as long as they meet AS/NZS 4858 or are approved for use under AS 3740. All waterproofing systems must be installed over clean, dry, correctly prepared surfaces.
Corners, edges and wall-floor junctions need to be sealed using bond breakers or flexible fillets to allow for movement. Once the membrane is applied (usually in two coats), it must be allowed to fully cure (typically over 24 to 48 hours) before tiling begins.
Tiling to the standards
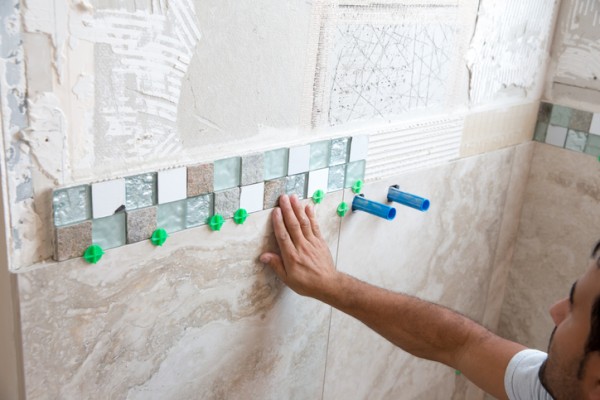
Once waterproofing is complete and cured, tiling can begin. Tiling work should be carried out in accordance with AS 3958.1, which includes guidance on:
- Adhesive selection
- Joint spacing
- Movement joints
- Grouting
- Slip resistance for floor tiles
It’s essential to ensure that the tile installation does not compromise the waterproof membrane, especially around drains, tap penetrations and floor junctions.
Common waterproofing mistakes
Some of the most frequent issues seen during inspections or post-renovation failures include:
- Incomplete wall coverage in showers
- Membranes applied too thinly or unevenly
- Tiling over uncured membranes
- Lack of fall to floor wastes
- DIY waterproofing with no certification
Even small lapses can lead to serious consequences, so it’s critical to get this stage of your renovation right.
Renovator compliance checklist
| Task | Requirement |
| Surface prep | Clean, dry, correct moisture level |
| Membrane | Compliant product; liquid or sheet |
| Membrane coverage | Floor + wall junctions + rising to required heights |
| Floor gradient | Falls between 1:80–1:50 towards waste |
| Integrity testing | Flood test before tiling |
| Tiling | AS 3958.1 compliant—adhesive, grout, slip resistance |
| Certification | Licensed applicator + compliance certificate |
Final advice
Waterproofing is not the place to cut corners or try DIY. Always hire a licensed professional who’s familiar with the latest versions of AS 3740, AS 3958.1 and the NCC.
If you’re working with a builder, ask to see the waterproofing certificate before signing off on the job. And when it comes time to tile, make sure everything is dry, tested and installed to standard.
Done properly, waterproofing protects your renovation for decades. Done poorly, it can cost you thousands.
